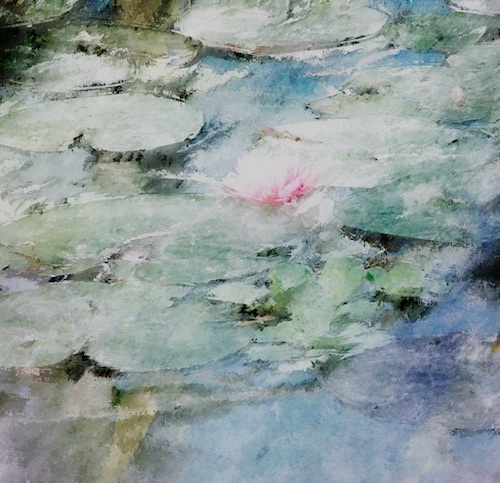
Using Blender to make a faux watercolour
Jun. 21st, 2022 11:34 pm
This is mostly for my own future reference because I have already half forgotten how I did it, and I assume a moderate knowledge of shaders and the compositor. That said you could do a lot of this in a regular image editor, the main technique is just using paint textures from textures.com as masks for blurring and colour variation.
Image descriptions are sparse but I've tried to cover all the important concepts in the text.
I used a couple of lilypad paintings by monet as a guide to for colour and brushstrokes.
I went back and tweaked the original photo as I went, to make the flower stand out and remove a few things which didn't filter well.
What I gave Blender:

The shader, which just ports the image into a "painting and shading" nodegroup and then tweaks the contrast and brightness:

The "painting and shading" nodegroup is inspired by this tutorial on making painterly object textures. I used a bunch of free textures from textures.com.
The "painting and shading" nodegroup is a bunch of adjustment layers like this:

This particular layer adds splotches of paler, bluer colour, with a mostly black paint-stroke texture used as the factor, with a Colorramp node making the texture sharp and black.
The layers are:
Hue: 0.8, Saturation: 1, Value: 0.8, set to screen (Pale blue)
Hue: 0.57, Saturation 0.7, Value 0.73, set to screen (pale green)
Hue: 0.39, Saturation 1.3, Value 1, set to mix (rich red)
Hue 1, Saturation 0.1, Value 0.03, set to multiply (darker)
Hue: 0.5, Saturation 0.5, Value: 1, set to screen (paler)
Hue: 1, Saturation: 0.5, Value: 1, set to mix (reversed colours)
I reused the same paint textures but at different scales.
Here's the image with the shader applied but no other changes:

Everything else is done in the compositor.
I have a value input of 2.0, which I think scales the textures?
First I apply an uneven blur, with a mostly white paint-stroke texture inputed into the blur node's size input:

The Blur settings are: Gaussian, Variable size, Relative, X and Y set to 5%. The same paint texture, multiplied by 0.5, is used as the factor in a mix node between the original and blurred images.
This is the result:

This is then distorted:

I created a distortion texture by sketching coloured lines along features of the lilypads and then layering this on top of a paint texture:

The colours were intended to work with how Blender equates colours with vectors, but this was a pain in the ass and didn't end up looking any better than just using shades of grey, with black = zero displacement and white = maximum displacement.
Here's the inputs to the Displace node:
Image: the blurred render, as created by the blur node group above
Vector: the distortion texture, minus 0.5 since this cut down on the amount of overall image skewing.
Xscale, Yscale: 50 divided by the scale value (eg 50/2=25)
I then place this over the top of the output of the blur node group with an Alpha Over node to fill in the little gaps created by the displace node.
Here's the distorted image:

Finally, I apply some watercolour textures with some mixrbg nodes set to soft light:

And the image is done!

no subject
Date: 2022-06-21 05:33 pm (UTC)no subject
Date: 2022-08-27 02:53 am (UTC)Thank you!
no subject
Date: 2022-06-22 07:00 am (UTC)I'm also fascinated by this, because I mostly knew Blender vaguely as the 3D modeling thing. I did not know it could do this! I actually really like the distortion texture version as well -- so many colors and swirls. :D
no subject
Date: 2022-08-01 08:21 pm (UTC)Thank you! Yeah it's not really what Blender is for, and I'm sure there's better programs for it, but I started looking into ways to make my 3d models prettier and this is where I ended up.